Alexa Lane - Holistic Counseling
Mind - Body - Soul
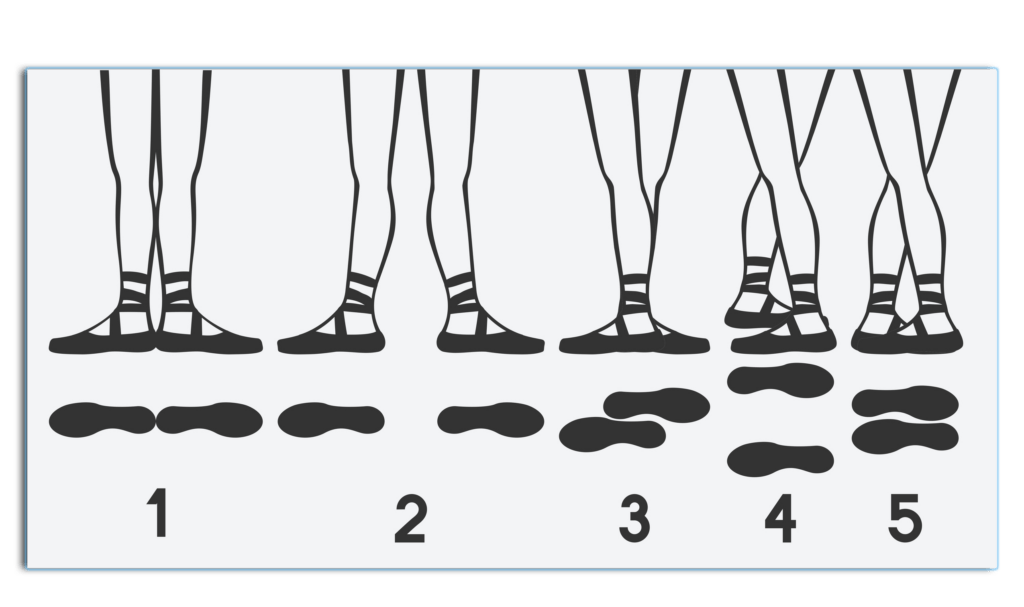
Five Positions of Dance
The Five positions of dance initiate many movement patterns. When working in these positions, maintain lateral rotation from your hip joints. Evenly distribute the weight of your body over your toes, balls of your feet, and your heels.
First Position
Begin with your legs parallel and your feet together. With your heels touching, laterally rotate your legs from your hip joint.
Second Position
Begin in First Position. Separate your heels one foot apart. Ballet instructors will assist their students in finding the healthiest and most appropriate position to suit individual needs.
Third Position
Cross one foot in front of the other, placing the foot in the middle of the other foot. Balance your weight evenly on both feet.
Fourth Position
From First Position, cross one foot in front of the other about one foot apart. Align your heels with your big toes, maintaining excellent lateral rotation.
Fifth Position
From Fourth Position, bring your feet together. Align your heels with your big toes. Balance your weight evenly on both feet. Maintain your lateral rotation from your hip joints.
INJURIES ASSOCIATED WITH ARABESQUE and DANCER (NATARAJASANA) POSE
Recently, I received a YouTube question regarding how to correct the injuries associated with arabesque. I am posting my response here as well.
I think, unfortunately, the problems associated with arabesque are not so much a correction issue, but rather an overuse injury. The movements needed to execute arabesque are not therapeutic in nature. Therefore, we need to cross train to alleviate some of the negative impact of the movement. The same problems occur with the Yoga pose called “Dancer/Natarajasana.”
What I would suggest to counteract the repetitive wear and tear of performing an arabesque would be to stretch and strengthen the opposing muscle groups.
To execute the arabesque we must extend the trunk at the spinal joints, anteriorly tilt the pelvis, externally rotate the thigh at the hip joint, and rotate the trunk at the spinal joints.
Rotation of the trunk, especially combined with posterior or anterior tilt can cause irritation to spinal discs. Therefore, if you are in acute pain avoid rotation of the spine.
Here are some exercises you may try to stretch and strengthen these areas.
• My first suggestion is to take a break from turn out and work in parallel sometimes. For instance, practice arabesque in a parallel position with a long back. This position elongates and strengthens the muscles of the trunk. Warrior Three Pose
• Lie on your back and bring the knees to the chest. This puts the spine in a posterior tilt and stretches the lower back. Apanasana Pose
• To stretch the external rotators of the thigh/hip, in the same back lying position place your right foot on your left knee, grab the back of your left thigh, and gently pull the left leg back toward your chest. Eye of The Needle Pose
• Strengthening the back extensor muscles can help. Simply lie in a prone position and gently lift the chest off the ground. Cobra Pose
• Strengthening and stabilizing the abdominal muscles will also help. The Dying Bug and Sunbird exercises work well for abdominal strengthening and spinal stabilization.
For more therapeutic stretches see my book Yoga Practice Essentials
I hope that helps!
Reiki Energy Cleansing Techniques
Joshin Kokyu-Ho: Reiki Cleansing Breath:
The translation in English is “the breathing method for cleansing the spirit.”
- Sit in a comfortable seated position with your spine erect
- Slowly, inhale through your nose.
- Imagine that you are breathing in Reiki energy along with the air.
- Visualize and feel the Reiki energy entering your Crown Chakra and moving throughout your body.
- Let your breath flow down below your navel and into your Second Chakra.
- It is common to experience a warm, energetic sensation as the Reiki enters your energy field.
The Reiki Shower Technique:
- You may use this technique anytime to cleanse your energy and connect to Reiki.
- To begin, sit or stand in a comfortable position.
- Place your hands in the Gassho position.
- Breathe calmly and deeply.
- Set the intention to cleanse your energetic field, body, mind, and soul with Reiki energy.
- Raise your arms over your head with the palms of your hands facing each other about 12 inches apart.
- Connect to Reiki and let the energy flow and intensify between your hands.
- Turn your palms downward to face the top of your head.
- Visualize Reiki radiating out of your hands and set the intention to receive a shower of Reiki.
- Let the Reiki shower flow over and cleanse your entire body and energetic field.
- After a few moments of letting the Reiki energy flow through your body from above, move your hands downward with your palms facing your body.
- Keep your hands approximately 12 inches from your body.
- Slowly, move your hands downwards in front of your face and continue all the way down your body to your feet.
- You may bend your knees to either touch the floor to ground the energy or gently shake your hands to release any negative energy.
- You may repeat this exercise a few times as needed.
- Finish the exercise by placing your hands in the Gassho position and express gratitude for the Reiki healing energy.
Kenyoku-ho: Dry Bathing
- Bring your right hand to your left shoulder. Breathe in calmly and draw your right hand down to your right hip making a diagonal line. Perform this movement with energy and vocalize a “Haah sound” as you breathe out.
- Repeat this exercise on the other side, with your left hand on your right shoulder and draw it down toward your left hip exhaling with energy.
- Once again, bring your right hand to your left shoulder and draw your right hand down to your right hip making a diagonal line.
- Lift your left arm out in front of you, parallel to the floor.
- Breathing in, place your right hand on your left shoulder.
- Breathing out, draw your right hand down your left arm and fingertips, while exhaling with energy.
- Lift your right arm out in front of you, parallel to the floor.
- Breathing in, place your left hand on your right shoulder.
- Breathing out, draw your left hand down your right arm and fingertips, while exhaling with energy.
- Complete the exercise by once again lifting your left arm.
- Breathing in, draw your right hand down your left arm and fingertips, while exhaling with energy.
*(In Japan the there is a superstition regarding the number four, which is the same word for death. Based on this reason, the exercise is performed 3 times.)
Hatsurei-ho Technique
This technique combines three separate practices called kenyoku-ho (dry bathing), joshin kokyu-ho, and seishin toitsu.
- Kihon Shisei: Standard Posture or Basic position
Sit comfortably in a seated position with your spine erect and palms facing downwards on your thighs. Close your eyes and focus on the tanden point below your navel. Breathe deeply. Affirm you are beginning Hatsurei-ho.
- Kenyoku -ho: Dry Bathing
- Connect to Reiki
- Joshin Kokyu-Ho: Spiritual Cleansing breath
- Gassho: Place your hands in the prayer position in front of your heart chakra.
- Seishin Toitsu: Concentration
With your hands in the Gassho position, breathe calmly through your nose, breathe in the Reiki energy, and let Reiki heal your whole being. You may keep your eyes open or closed.
Next, focus your breath and energy on your hands and visualize Reiki flowing into your heart chakra. Let the Reiki circulate throughout your body and energetic field. You may visualize Reiki as white light energy. As you exhale, visualize Reiki energy healing all living beings, the planet, and the universe.
Optional:
- Gokai Sansho: Chant
Traditionally, Miko Usui would have students recite the five Reiki principles.
- Mokunen: Silent prayer
To finish, place your hands on your thighs and affirm that Hatsurei-ho is complete.
History of Reiki
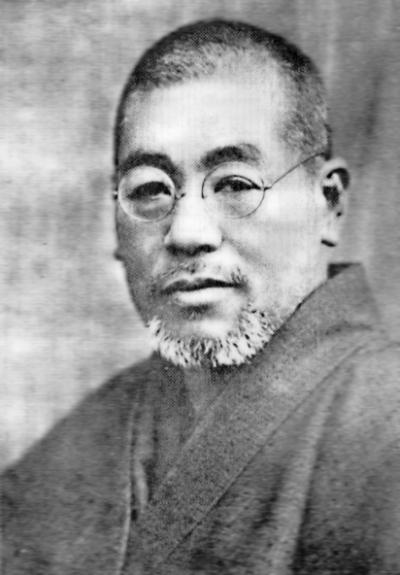
Mikao Usui
The founder of Reiki is Mikao Usui. He was born on August 15, 1865, in Taniai, a village in the district of Gifu prefecture. Most of the information written about him is on the memorial stone erected by his students in 1927. The authors of the Usui Memorial are Juzaburo Ushida and Masayuki Okada.
A summary of his biography:
- He was married and had a son and daughter.
- His interests included medicine, psychology, fortune-telling, and religion.
- He had many changes in his career. At a certain point, he encountered obstacles.
- One day, he embarked on a 21-day retreat to fast and meditate on Mount Kurama near Kyoto.
- During this time, he experienced a sense of inner awakening, or great Reiki sensation above his head, which led to the development of the Reiki spiritual healing method.
- Usui tried Reiki on himself and his family and found it helped heal ailments.
- In April 1922, he opened a clinic in Harajuku, Aoyama, Tokyo.
- Usui later created the Usui Reiki Ryoho Gakkai, an organization of Reiki practitioners, to provide Reiki treatments.
- He passed away in 1926.
- He encouraged his student, Dr. Chujiro Hayashi, to continue the practice of Reiki.
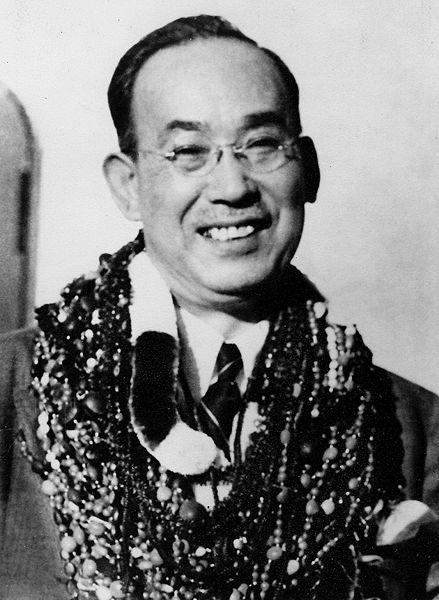
Dr. Chujiro Hayashi
Dr. Chujiro Hayashi was born in Tokyo on September 15, 1880. He was a medical doctor and a Japanese Navy officer. He developed Reiki techniques utilizing his knowledge of medicine and further developed hands-on healing techniques. Later, he opened a school and clinic. In time, he trained a Japanese American woman named Hawayo Takata, awarding her a certificate in Reiki Mastership. He helped her start a Reiki practice in Hawaii.
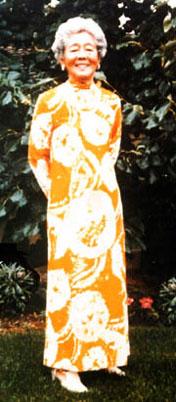
Hawayo Takata
Hawayo Takata was born on December 24, 1900, in Hawaii. She discovered Dr. Hayashi’s clinic while visiting her family in Japan. During her visit, she became ill and received treatment at Dr. Hayashi’s Reiki clinic to avoid surgery. The Reiki treatments provided healing for her illness. She subsequently convinced Dr. Hayashi to train her in Reiki. After receiving her Reiki Master training from Dr. Hayashi, she established a Reiki practice in Hawaii. Hawayo Takata trained 22 Reiki masters before she passed away in 1980. She and Dr. Hayashi had a significant impact on the practice of Reiki in the West.


